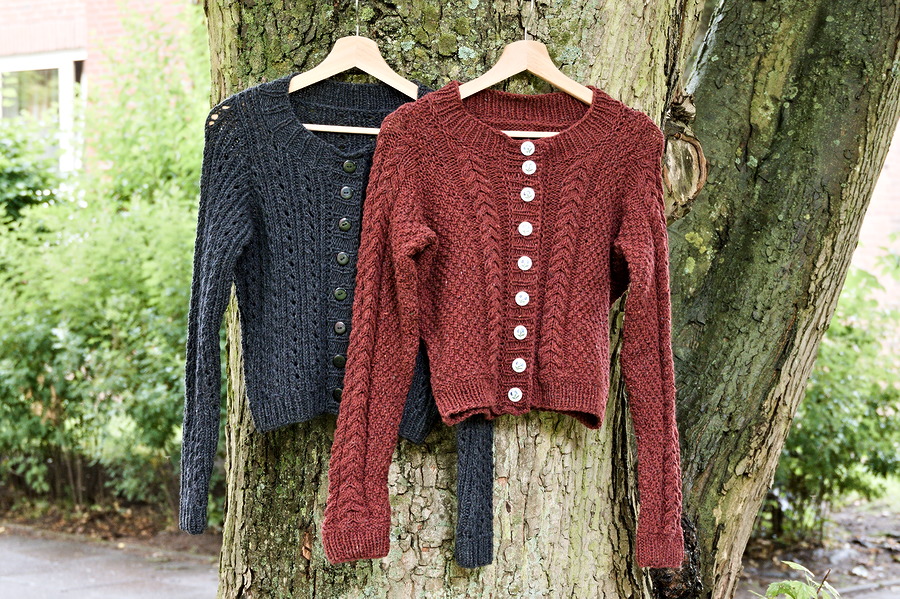
 Charcoal and red versions of my Van Helsing cardigan
By Anna - 1st July 2024
A customisable fitted cardigan recipe
For several months this year knitting has taken a backseat in my life. It was often boring, felt more like a chore than something I do for fun and reading was always more appealing. Until a random burst of inspiration struck and I knitted two cardigans in a week. They are both from the same yarn and followed the same construction, which I made up as I went. They were exactly what was needed to back me back into the craft.
Making up the pattern as I went meant there was no boring bit. I could use as much texture and interest as I wanted and just when it started to feel repetitive, the next decision about the shaping needed to be made. They are also knitted in pieces and seamed, a construction method that is not very popular any more despite being very enjoyable. It is so satisfying to finish piece by piece and seaming them up later, pulling the yarn through and see the ragged edges disappear into a neat straight line. Even setting in the sleeves, which can be daunting, it actually very easy with proper preparation. The most annoying part was sewing on the buttons, the one reason I often default to a pullover. But for these, it was worth every step.
When I showed the red cardigan to friends on a knitting Discord, where I am the vampire slayer since I started telling Americans to go to bed if they are still lurking online in my morning, it was declared the Anna van Helsing cardigan. Cosy enough for movie night, but practical enough for vampire hunting. Thank you to Juliane for the excellent name and description.
 Charcoal and red versions of my Van Helsing cardigan
The cardigans are very fitted to my body, that does not fit into one specific standard size. For reference, here are a few key measurements:
The average gauge used to determine stitch counts is 16st/10cm. It varies in the actual garment, the cables are tighter, the texture stitch more open. But it worked out across the entire garment. The goal was zero to slight negative ease with very fitted shoulder. Watch out if you try to follow this recipe: My shoulders are extremely narrow, you may not need to take the armholes as far in.
The yarn used for both versions is Hjertegarn New Life Wool, a blend of 65% wool and 35% other fibers with 200m/100g. The red version used exactly 400g.
The main fabric is knitted on 5mm needles, with 4mm needles for the ribbing at hem, cuffs, neckline and button bands.
The back is the part I like to start with when not following a pattern. It is more solid than the front and all the relevant shaping parts are present, so the construction of the back will determine many important parts for front and sleeves. Due to the different stitch patterns, the charcoal version has a stitch less on back and sleeves than the red version to ensure everything is centred. Stitch counts for the charcoal version are given in parentheses where they differ from the red version.
For all pieces, the edge stitches are always knit on the right side and purled on the wrong side. I find it easier to seam the pieces up neatly if the edge stitches are not slipped in the beginning of the row, but do as you prefer.
With 4mm cast on 71 stitches. Knit ribbing for 10 rows, remember that the first row is a wrong side row. Red version used k1, p1, charcoal version used p2, k1 (and of course k2, p1 on the wrong side). The transition varies slightly as well:
Red version: Knit across the next 3 rows (garter stitch), ending with a WS row.
Charcoal version: On the next row (WS) k5, sl1 with yarn in front. Make sure the center stitch is slipped. The slipped stitches should be knit stitch on the right side.
Now, change to 5mm needles and begin knitting from the chart for each version.
Red version: Make sure the cables are centred. All other stitches are knit in moss stitch, k1, p1 across, offsetting the pattern on every RS row so there are always two knits and two purls stacked atop each other. You will need to increase one stitch in the middle to center the cables (72 total)
Charcoal version: Make sure the center stitch is a ktbl. All eyelets to the right of the center stitch are formed by k2tog, yo, k1, all to the left of the center stitch are formed by k1, yo, ssk.
Continue in pattern and increase five times on either side, including the new stitches into the pattern as they appear. After the increases you have 82 (81) stitches total.
Red version: Increase whenever the center cable crosses.
Charcoal version: Increase on every third eyelet row.
When the increases are finished, continue to knit in pattern until the pieces reaches the desired length to the underarm. For me it worked out to be right before the 16th cross of the small cables in the red version and the 16th eyelet row on the charcoal version. Now begin to shape the underarm. On the beginning of the next rows, bind off 7, 4, 3, 2, 1, 1 stitch on either side. Remember that my shoulders are very narrow. You may not need to take it in as far. Continue to knit in pattern until the piece measures about 18cm from where you started the underarm shaping. This worked out to be the 23rd cross of the smaller cables/eyelet row for me.
Knit 7 in pattern, bind of the next stitches until 7 remain, knit those in pattern. The shoulders are now finished separately. Knit 2 rows in pattern. Bind off 4 in the beginning of the next row. Knit across the remaining stitches in pattern. Bind off. This slopes the shoulders very slightly. Reattach yarn to the other shoulder from the right side and shape accordingly.
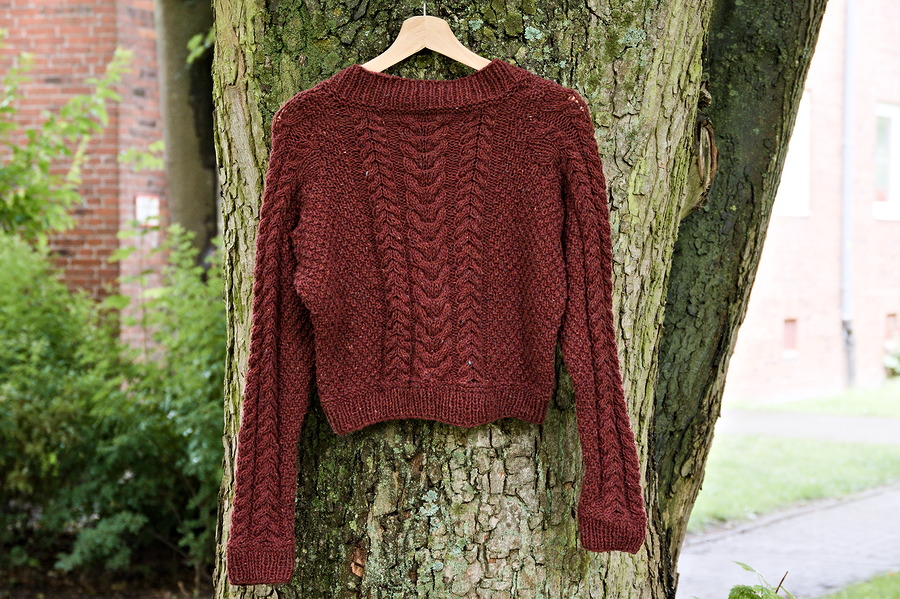 Red version: Centred back cable
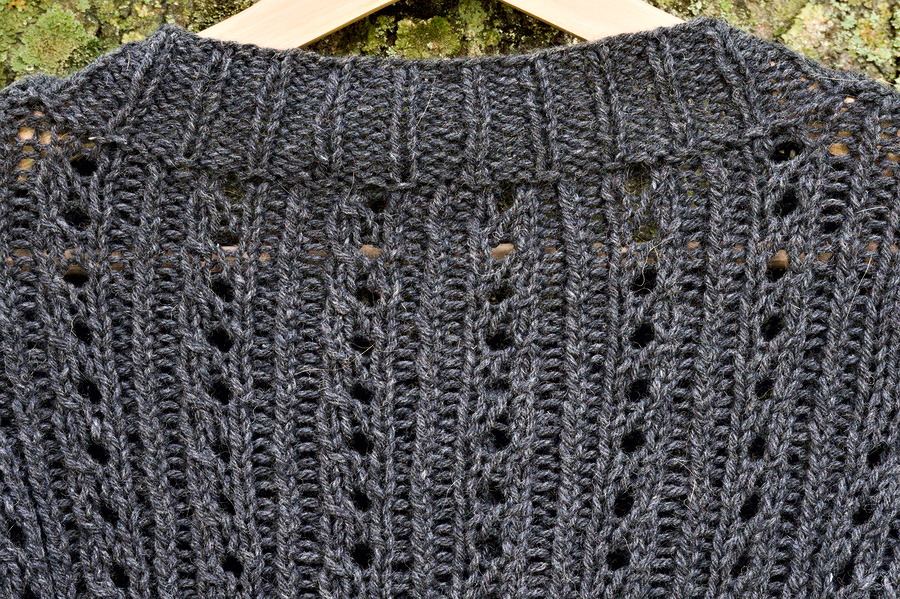 Charcoal version: Left and right leaning eyelets
Start with the left front. Cast on 31. Knit ribbing for ten rows, then transition as for the back piece.
With 5mm set up the pattern as follows:
Red version: Knit in moss stitch until 13 stitches remain. Knit according to chart. Knit on edge stitch.
Charcoal version: Set up the ribbing and eyelet pattern so that the left side, on which the button band will later be picked up, ends on p1, k1tbl, p1, k1 (edge).
Increase and shape armhole as you did for the back. Once the armhole shaping is completed, shape the neck by binding off 4, 3, 2, 1, 1 stitches in the beginning of every other row. 7 stitches should remain. Continue to knit in pattern until the piece matches the back. Bind off with the same shoulder slope.
Make right front in the same manner, but mirrored. For the charcoal version please note: All eyelets on the left front are formed by k2tog, yo, k1, all on the right front are formed by k1, yo, ssk.
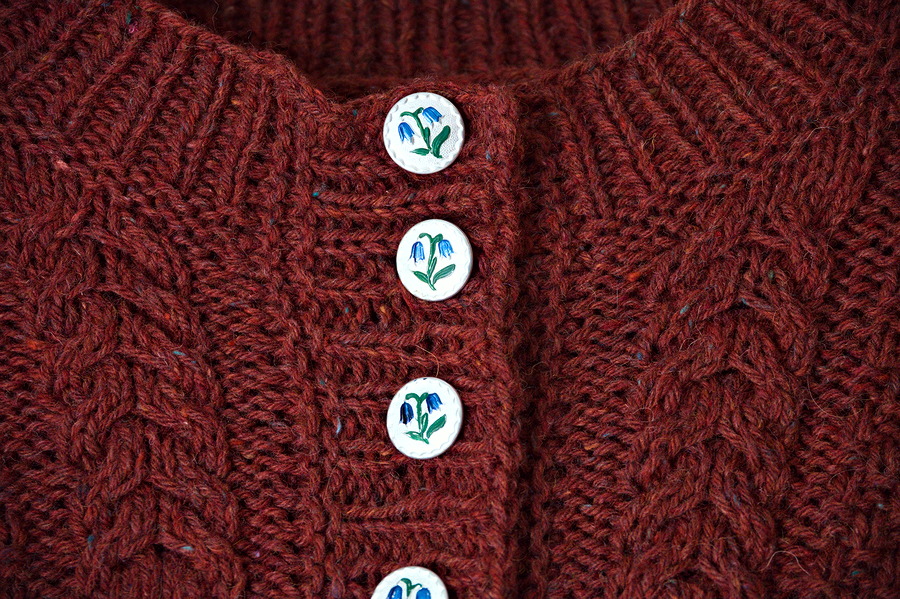 Red version: Front cables and buttons
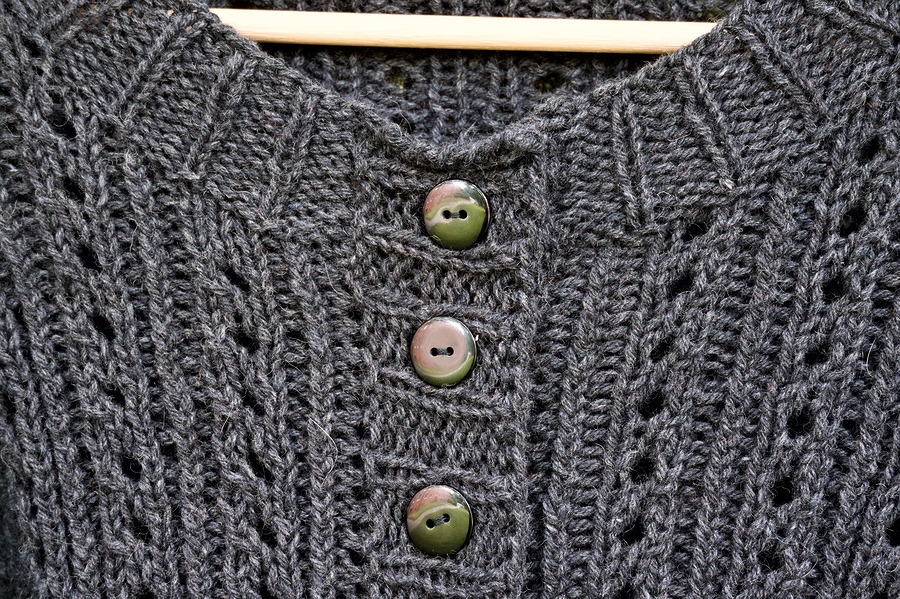 Charcoal version: Left and right leaning eyelets
With 4mm needles cast on 42 (41) stitches. Knit ribbing and transition as for front an back.
With 5mm needles set up the pattern so that the cable is centred (red version) or a ktbl is the center stitch (charcoal version). Continue to knit in pattern while increasing every 8th row (every other cable or eyelet row) a total of ten times, 62 (61) stitches total. Continue in pattern until the sleeve reaches the desired length from to the underarm, the start to shape the sleeve cap.
Bind off 7, 4, 3, 2 stitches on either side in the beginning of next rows. This should match the back and front piece, if you altered the bind-off pattern there, adjust accordingly on the sleeves. Continue to bind off 1 stitch in the beginning of each row until 24 (23) stitches remain. Bind off the remaining stitches over the next five rows.
Red version: Bind off 5 in the beginning of the next two rows, then 4 on the next two rows. Bind of the remaining 6 stitches on the right side.
Charcoal version: Bind off 5 in the beginning of the next two rows, then 3 in the beginning of the following two rows. Bind of the remaining 7 stitches from the right side.
Make second sleeve the same way.
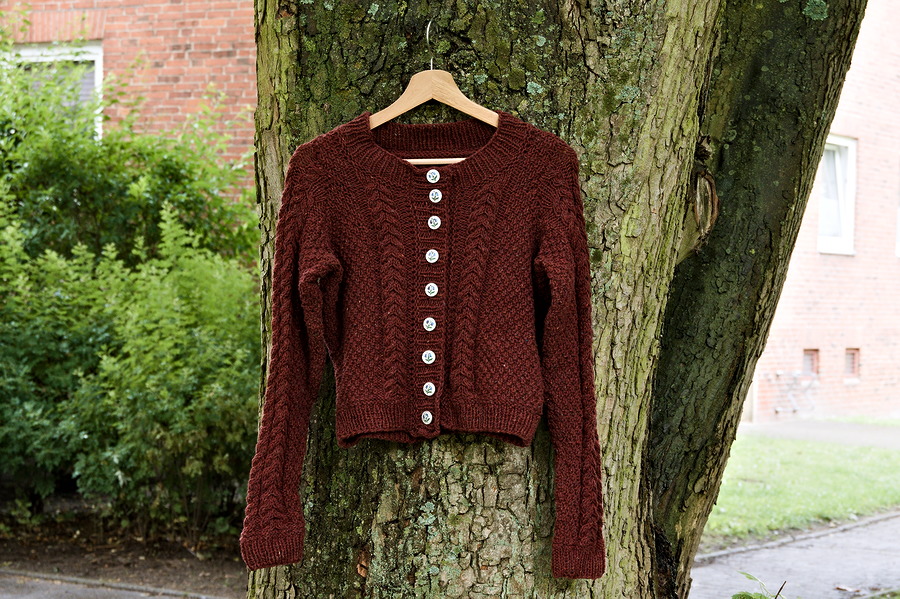 Red version: Fully assembled
Seam shoulders together, then seam up sides. With 4mm needles pick up an odd number of stitches along the neckline (approx. 75-80). First and last stitch of these are treated as edge stitches and the edge stitch of the front pieces should be picked up as well.
Red version: Knit three rows, then knit k1, p1 ribbing for ten rows. Bind off.
Charcoal version: Knit 1 row, then k1, p2 for ten rows, skip the slip stitch row of the bottom transition. Make sure the ribbing is centred so that both edges are mirrored. Bind off.
Pick up stitches along the left front. My row gauge usually works best with a pick up rate of 1 stitch for every 2 rows. 2 stitches out of every three rows are more common. Adjust for your row gauge to make sure the button band will lie flat.
Red version: Pick up an odd number for k1, p1 ribbing, for me 53 worked well.
Charcoal version: Pick up a multiple of 3 + 1 for k1, p2 ribbing, I picked up 52.
For both versions, there are no edge stitches on the button band. First and last stitch should be knit on the right side. Transition and knit ribbing as for the neckband. To ensure the button band lies flat, use a very stretchy bind-off method.
Pick up the same number of stitches on the right front and knit as for the left, but add buttonholes roughly on the middle row. My preferred method is k2tog, yo twice, but yours may vary. Space the buttons as far apart or as close together as you like. The red version has nine buttons, the charcoal version has eight.
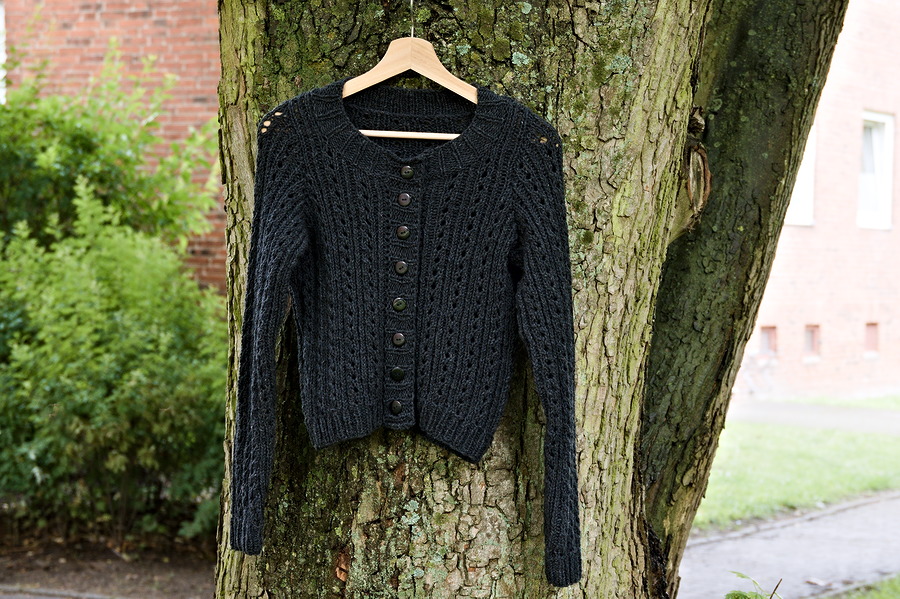 Charcoal version: Fully assembled
Seam up sleeve to the underarm. Line up the steps of bound-off stitches to the body - I like to use safety pin stitch markers to connect the matching points. Sew sleeve into place. Repeat for second sleeve.
As always, weave in ends, soak in water and wool wash and lay flat to dry. Attach buttons.
Enjoy, and please share any projects you make from this.
Legend (showing the appearance on the right side. On the WS, knit the knits and purl the purls.)
Charcoal version: left and right leaning eyelet options
Red version: back cable
Red version: sleeve chart
Red version: front chart